-
[Django tutorial] django official tutorial part2 정리Software, Computer Science/Django, Flask 2020. 2. 3. 20:36
Part 2
myproject/settings.py 살펴보기
django framework에서 DB설정 변경은 myproject/settings.py에서 가능하다. 기본 DBMS는 같이 설치되어 내장된 SQLite3 을 사용한다. django를 공부하거나 간단히 테스트 하는 용도로는 부족함이 없고 실제 프로젝트에선 다른 DB를 사용하는 것을 권장한다. settings.py 안에 있는
DATABASE에default항목의 값을 수정해 주면 된다. 가능한 종류는 (링크참고)SQLite이외의 DB는 해당 프로젝트 경로에 DB를 직접 생성해주어야 한다.
DATABASES = {
    'default': {
      	# 이 부분을 수정해주면 된다
        'ENGINE': 'django.db.backends.sqlite3',
        'NAME': os.path.join(BASE_DIR, 'db.sqlite3'),
    }
}
또 유심히 살펴보아야 할 부분은
INSTALLED_APPS이다. django 프로젝트 내에서 app을 생성하게 되면 이 부분에 추가를 해 주어야 사용할 수 있다.INSTALLED_APPS = [ 'django.contrib.admin', 'django.contrib.auth', 'django.contrib.contenttypes', 'django.contrib.sessions', 'django.contrib.messages', 'django.contrib.staticfiles', ]기본적으로 위와 같은 앱들이 딸려오게 된다.
- django.contrib.admin : 관리용 페이지, 자주 사용하게 됨.
- django.contrib.auth : 인증 시스템
- django.contrib.contenttypes : 컨텐츠 타입을 위한 framework
- django.contrib.sessions : 세션 framework
- django.contrib.messages : 메세징 framework
- django.contrib.staticfiles : 정적 파일을 관리하는 framework
모델 만들기
django framework에선 DB를 만들기 위해 직접 SQL쿼리문을 사용하지 않고 ORM이라는 개념을 사용해서 DB에 테이블을 정의 및 생성 한다.
from django.db import models


class Question(models.Model):
    question_text = models.CharField(max_length=200)
    pub_date = models.DateTimeField('date published')


class Choice(models.Model):
    question = models.ForeignKey(Question, on_delete=models.CASCADE)
    choice_text = models.CharField(max_length=200)
    votes = models.IntegerField(default=0)
ORM이란 OOP(Objected Oriented Programming)언어의 개념을 사용하여 RDBMS(Relational DataBase Management System)시스템에 매핑을 해서 복잡한 SQL의 처리 대신 쉽게 DB를 구성하는 방식이다.

(이미지 출처 :The Django Book)
위의 예제를 살펴보면 각각의 field데이터는 DB에 각 field는 Field 클래스의 인스턴스로 표현된다. Field클래스의 이름이 직관적이여서 쉽게 정의하고 이해할 수 있다.
정리하면 위 모델 코드는 DB Schema생성, Question, Choice객체에 접근하기 위한 python api생성 등의 역할을 한다.
INSTALLED_APPS = [
    'polls.apps.PollsConfig',
    'django.contrib.admin',
    'django.contrib.auth',
    'django.contrib.contenttypes',
    'django.contrib.sessions',
    'django.contrib.messages',
    'django.contrib.staticfiles',
]
새롭게 app을 생성하고 사용할 것이므로
settings.py에 있던INSTALLED_APPS에 추가를 해주고 migration을 진행한다.$ python manage.py makemigrations pollsMigrations for 'polls': polls/migrations/0001_initial.py - Create model Question - Create model Choice이런 식의 결과가 나오고 다음 명령어로 sqlmigrate를 해보면,
$ python manage.py sqlmigrate polls 0001BEGIN; -- -- Create model Question -- CREATE TABLE "polls_question" ("id" integer NOT NULL PRIMARY KEY AUTOINCREMENT, "question_text" varchar(200) NOT NULL, "pub_date" datetime NOT NULL); -- -- Create model Choice -- CREATE TABLE "polls_choice" ("id" integer NOT NULL PRIMARY KEY AUTOINCREMENT, "choice_text" varchar(200) NOT NULL, "votes" integer NOT NULL, "question_id" integer NOT NULL REFERENCES "polls_question" ("id") DEFERRABLE INITIALLY DEFERRED); CREATE INDEX "polls_choice_question_id_c5b4b260" ON "polls_choice" ("question_id"); COMMIT;위와 같이 실제 실행된 SQL문을 확인할 수 있다. DB table 이름이 어떻게 정의 되는지와 PK가 자동으로 추가되는 부분을 체크하고 실제 django가 어떻게 SQL문을 바꿔 해석하는지 알 수 있는 부분이다. 이제 실제로 migrate를 진행해 보자.
$ python manage.py migrateOperations to perform: Apply all migrations: admin, auth, contenttypes, polls, sessions Running migrations: Applying contenttypes.0001_initial... OK Applying auth.0001_initial... OK Applying admin.0001_initial... OK Applying admin.0002_logentry_remove_auto_add... OK Applying admin.0003_logentry_add_action_flag_choices... OK Applying contenttypes.0002_remove_content_type_name... OK Applying auth.0002_alter_permission_name_max_length... OK Applying auth.0003_alter_user_email_max_length... OK Applying auth.0004_alter_user_username_opts... OK Applying auth.0005_alter_user_last_login_null... OK Applying auth.0006_require_contenttypes_0002... OK Applying auth.0007_alter_validators_add_error_messages... OK Applying auth.0008_alter_user_username_max_length... OK Applying auth.0009_alter_user_last_name_max_length... OK Applying auth.0010_alter_group_name_max_length... OK Applying auth.0011_update_proxy_permissions... OK Applying polls.0001_initial... OK Applying sessions.0001_initial... OK위 명령어는 makemigrations이 에러 없이 진행되었다면 실제로 migrate를 해준다. 해당 명령어는 DB table을 직접 건들지 않고 model의 변경을 쉽게 해주면서 자료의 손실을 없게 한다. 모델 변경 방법을 정리하면
- (models.py에서) 모델을 변경
- python manage.py makemigrations
- python manage.py migrate
로 요약할 수 있다.
DB API 다루기
model을 통해 만들어진 DB데이터를 python interpreter를 통해 데이터를 추가한 뒤 확인 작업을 진행해 보기
# polls/models.py
import datetime

from django.db import models
from django.utils import timezone


class Question(models.Model):
    question_text = models.CharField(max_length=200)
    pub_date = models.DateTimeField('date published')

    def __str__(self):
      	return self.question_text

    # published 된지 1일 이상 되었는지 검사하는 메소드
   	def was_published_recently(self):
      	return self.pub_date >= timezone.now() - datetime.timedelta(days=1)

class Choice(models.Model):
    question = models.ForeignKey(Question, on_delete=models.CASCADE)
    choice_text = models.CharField(max_length=200)
    votes = models.IntegerField(default=0)

    def __str__(self):
      	return self.choice_text
django 프로젝트 내에서 python interpreter의 사용은 다음 명령어롤 통해 사용 가능하다
$ python manage.py shell쉘 진입 후 DB API 를 사용하여 아래와 같이 처리해 준다면 임의로 DB에 데이터를 넣을 수 있다.
>>> from polls.models import Choice, Question  # Import the model classes we just wrote.

# No questions are in the system yet.
>>> Question.objects.all()
<QuerySet []>

# Create a new Question.
# Support for time zones is enabled in the default settings file, so
# Django expects a datetime with tzinfo for pub_date. Use timezone.now()
# instead of datetime.datetime.now() and it will do the right thing.
>>> from django.utils import timezone
>>> q = Question(question_text="What's new?", pub_date=timezone.now())

# Save the object into the database. You have to call save() explicitly.
>>> q.save()

# Now it has an ID.
>>> q.id
1

# Access model field values via Python attributes.
>>> q.question_text
"What's new?"
>>> q.pub_date
datetime.datetime(2012, 2, 26, 13, 0, 0, 775217, tzinfo=<UTC>)

# Change values by changing the attributes, then calling save().
>>> q.question_text = "What's up?"
>>> q.save()

# objects.all() displays all the questions in the database.
>>> Question.objects.all()
<QuerySet [<Question: Question object (1)>]>
>>> from polls.models import Choice, Question # Make sure our __str__() addition worked. >>> Question.objects.all() <QuerySet [<Question: What's up?>]> # Django provides a rich database lookup API that's entirely driven by # keyword arguments. >>> Question.objects.filter(id=1) <QuerySet [<Question: What's up?>]> >>> Question.objects.filter(question_text__startswith='What') <QuerySet [<Question: What's up?>]> # Get the question that was published this year. >>> from django.utils import timezone >>> current_year = timezone.now().year >>> Question.objects.get(pub_date__year=current_year) <Question: What's up?> # Request an ID that doesn't exist, this will raise an exception. >>> Question.objects.get(id=2) Traceback (most recent call last): ... DoesNotExist: Question matching query does not exist. # Lookup by a primary key is the most common case, so Django provides a # shortcut for primary-key exact lookups. # The following is identical to Question.objects.get(id=1). >>> Question.objects.get(pk=1) <Question: What's up?> # Make sure our custom method worked. >>> q = Question.objects.get(pk=1) >>> q.was_published_recently() True # Give the Question a couple of Choices. The create call constructs a new # Choice object, does the INSERT statement, adds the choice to the set # of available choices and returns the new Choice object. Django creates # a set to hold the "other side" of a ForeignKey relation # (e.g. a question's choice) which can be accessed via the API. >>> q = Question.objects.get(pk=1) # Display any choices from the related object set -- none so far. >>> q.choice_set.all() <QuerySet []> # Create three choices. >>> q.choice_set.create(choice_text='Not much', votes=0) <Choice: Not much> >>> q.choice_set.create(choice_text='The sky', votes=0) <Choice: The sky> >>> c = q.choice_set.create(choice_text='Just hacking again', votes=0) # Choice objects have API access to their related Question objects. >>> c.question <Question: What's up?> # And vice versa: Question objects get access to Choice objects. >>> q.choice_set.all() <QuerySet [<Choice: Not much>, <Choice: The sky>, <Choice: Just hacking again>]> >>> q.choice_set.count() 3 # The API automatically follows relationships as far as you need. # Use double underscores to separate relationships. # This works as many levels deep as you want; there's no limit. # Find all Choices for any question whose pub_date is in this year # (reusing the 'current_year' variable we created above). >>> Choice.objects.filter(question__pub_date__year=current_year) <QuerySet [<Choice: Not much>, <Choice: The sky>, <Choice: Just hacking again>]> # Let's delete one of the choices. Use delete() for that. >>> c = q.choice_set.filter(choice_text__startswith='Just hacking') >>> c.delete()Django admin 페이지 사용
역시 manage.py를 통해 admin을 만들고 몇가지의 소스코드 추가를 통해 관리자 페이지를 만들어 접근할 수 있다.
$ python manage.py createsuperuserUsernamd : adminEmail address : admin@example.comPassword: ********** Password (again) : ********** Superuser crated successfully.관리자 페이지에서 poll app을 변경가능하도록 만들기
기본적인 관리자 페이지를 활용할 수 있지만 실질적으로 앱이 수정될 수 있도록 [app_name]/admin.py에 관리자 페이지를 등록 할 수 있다.
from django.contrib import admin

from .models import Question

admin.site.register(Question)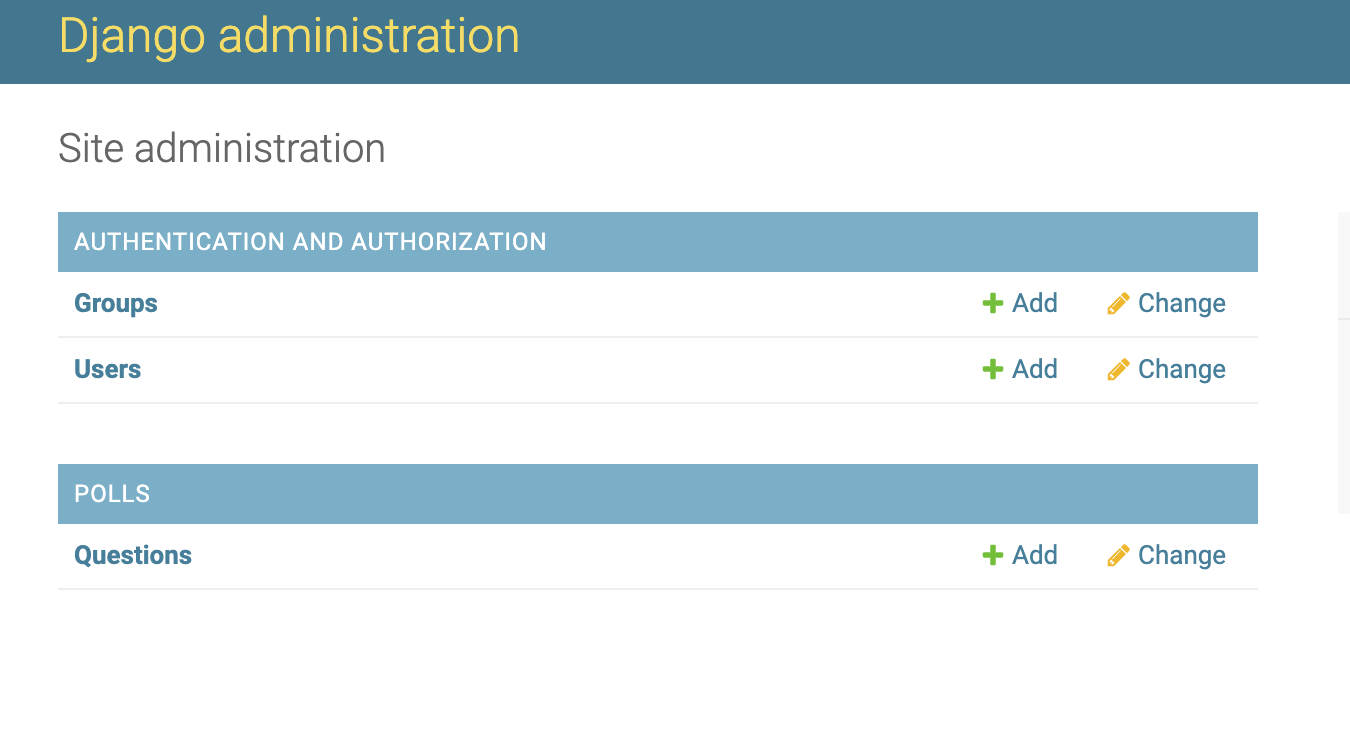
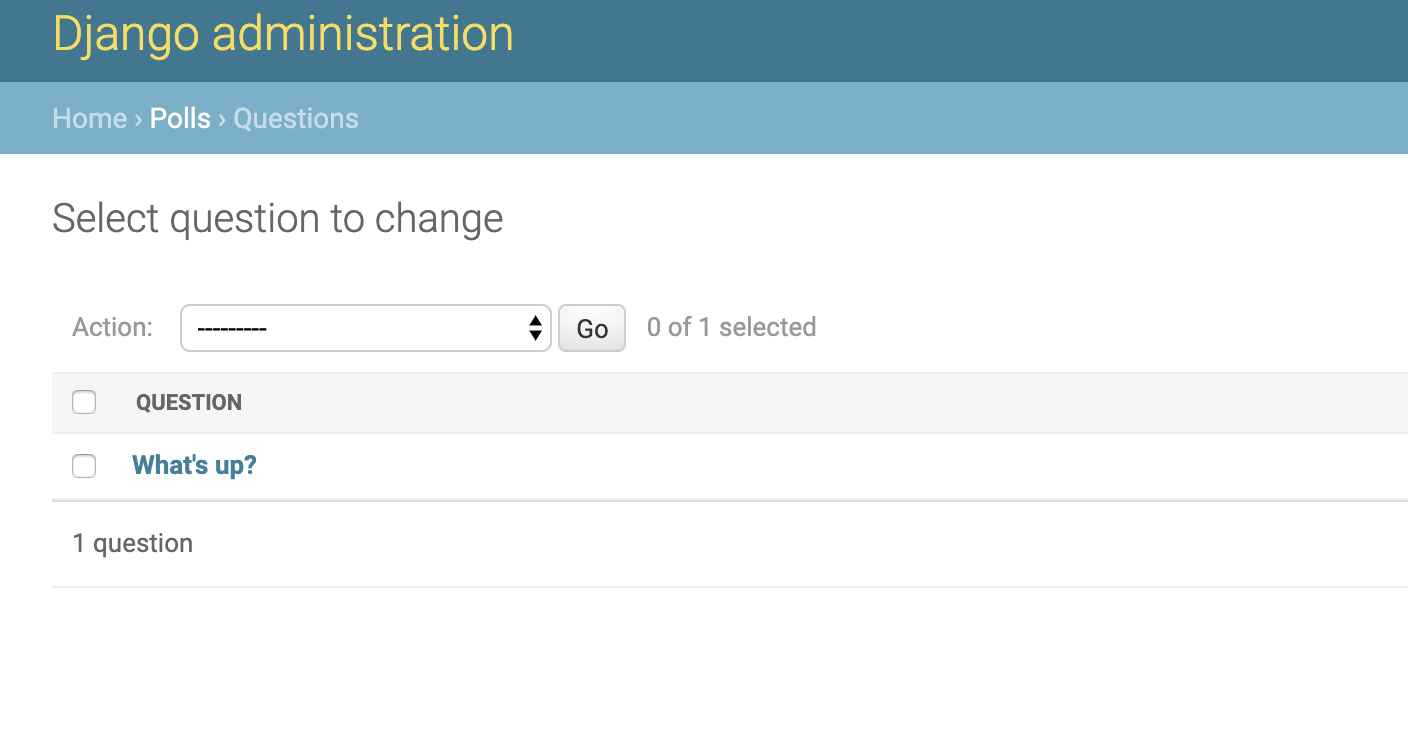
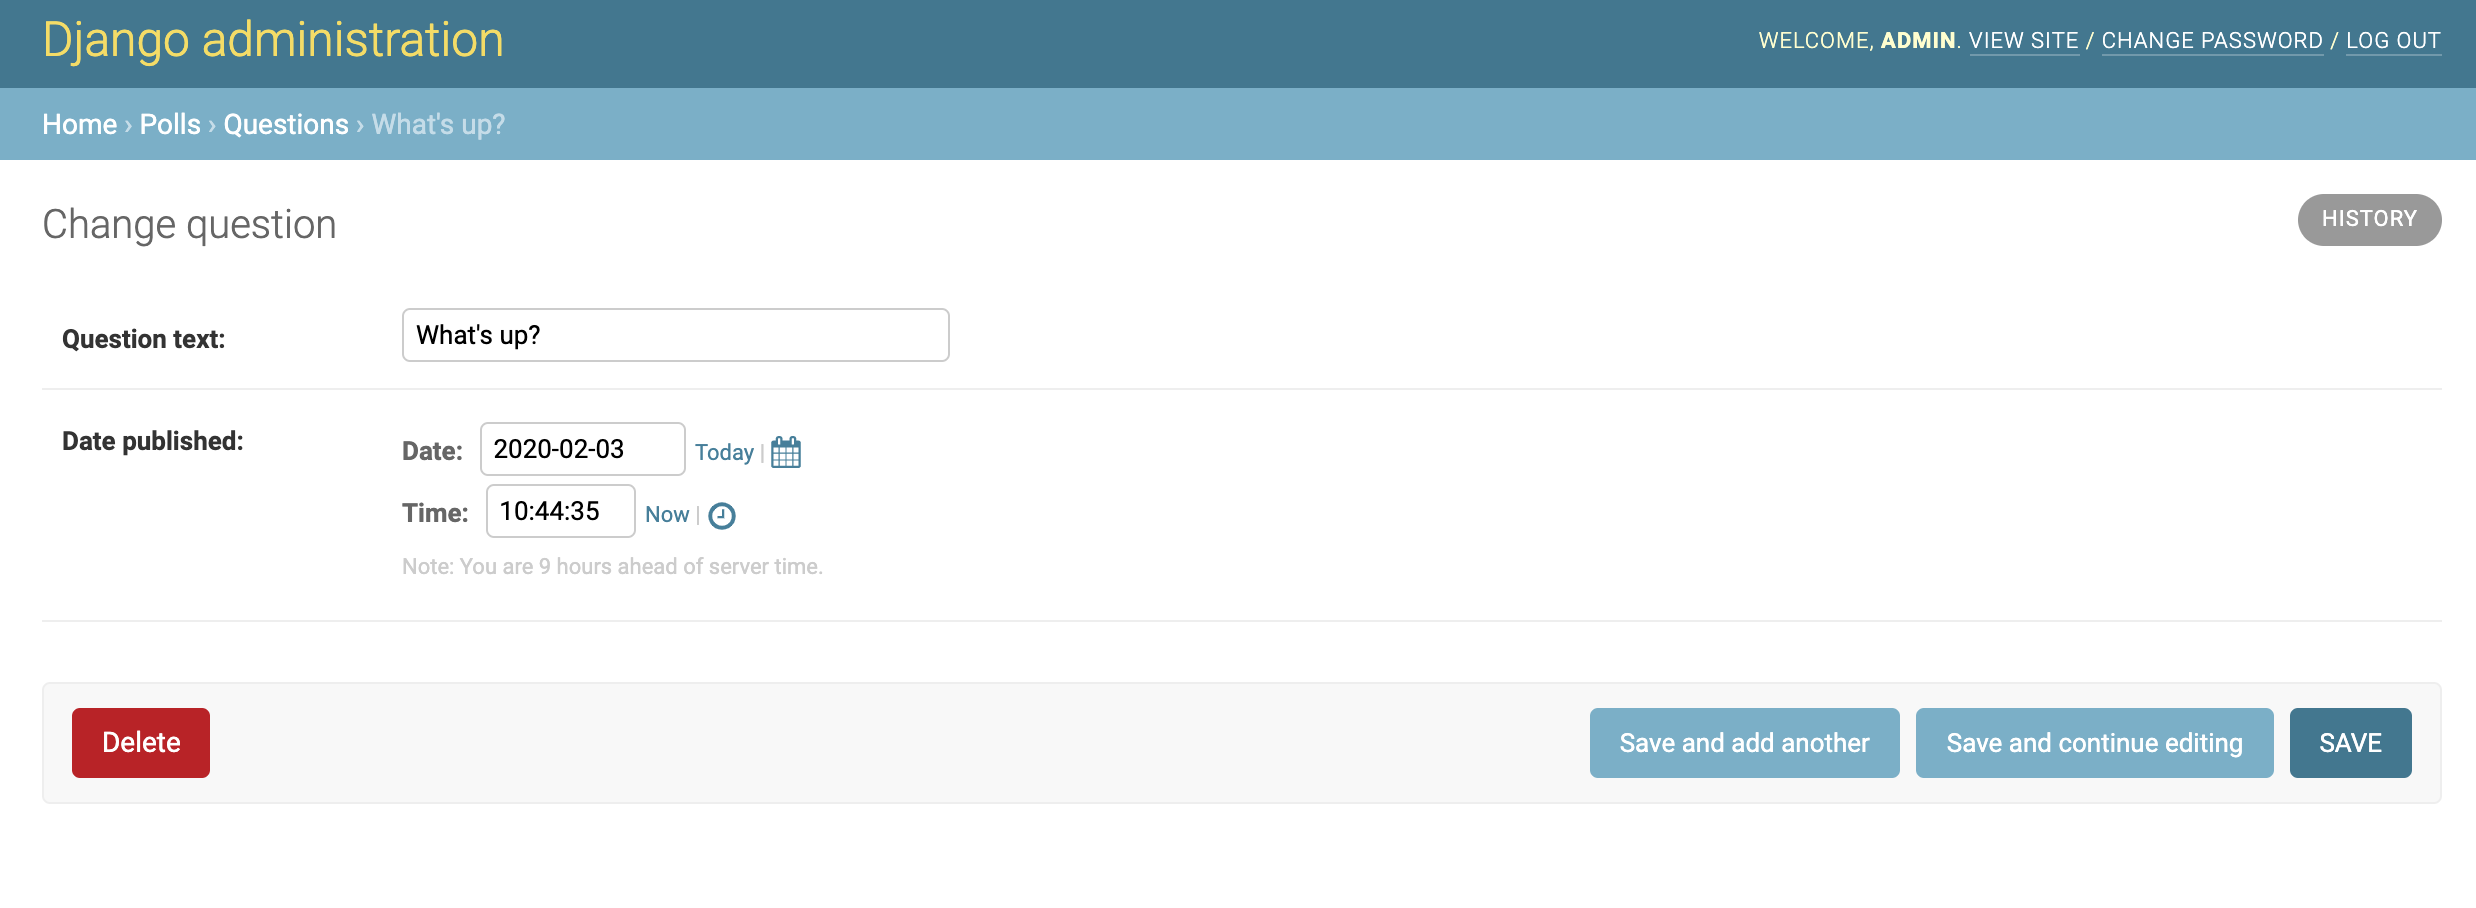
실행해보고 로그인 하면 다음과 같은 페이지가 뜨고 superuser계정을 사용하여 로그인 해보면 다음과 같이 admin page에서 데이터를 수정할 수도 있다. 각 데이터는 model에 정의한 대로 form 또한 맞춰져 있다.
Reference
https://docs.djangoproject.com/ko/3.0/intro/tutorial02/
'Software, Computer Science > Django, Flask' 카테고리의 다른 글
[Django] 간단한 endpoint를 django 에서 구현해 보기 (0) 2020.02.07 [Django] Django MVT 패턴에 관한 내용 정리, url이 분석되는 순서 (0) 2020.02.05 [Django tutorial] django official tutorial part4 정리 (0) 2020.02.03 [Django tutorial] django official tutorial part3 정리 (0) 2020.02.03 [Django tutorial] django official tutorial part1 정리 (0) 2020.02.03 댓글